May 15, 2025 | 3 min read
The Eventact Salesforce Interface enables synchronization between Eventact and Salesforce, ensuring that contacts and leads are created or updated automatically based on registration and ticket purchases at your events. This integration helps event organizers efficiently track attendee engagement and sales within Salesforce.
Make Connection with Salesforce
Eventact will search Salesforce by email or by first and last name to find an existing contact. If no matching contact is found, a new contact or lead will be created. The data in Salesforce and Eventact will be synchronized based on the field mappings configured in the Eventact Salesforce Interface Setup. In addition to custom mappings, you can choose the fields you'd like to update in your Salesforce platform.
To connect Eventact with your Salesforce account you will need to grant Eventact access to your Salesforce data on behalf of the specified user. For this, you need to add this user's login, password and security token.
What is an Security Token
Security Token (or Access Token) is like a username/password for applications to access each other. It grants permissions for applications like Eventact to access the Salesforce API on behalf of a Salesforce user.
How to Generate a Security Token for Salesforce
- Set up a user in Salesforce or select an existing one. Grant that user the least privileges necessary for its intended use.
- Log in to the user's Salesforce account.
- Click the profile avatar and choose Settings.
- Select My Personal Information → Reset My Security Token.
- Enter the generated security token in the designated field within Eventact. Note: Salesforce token is case-sensitive.
- Click Test Login to test whether Eventact can access the Salesforce account.
Other Settings
-
Synchronization Options
- Automatic after registration: Each registration triggers immediate synchronization for that individual.
-
Bulk: Synchronize all registrants for a specific event at once. This is initiated from the registrant list and includes imported or uploaded registrants.
Results: After synchronization, you'll see a report on newly created or updated contacts/leads. - Sync key: email or first and last name
-
Create Contacts or Leads
Select if Eventact will create a Salesforce Lead or Salesforce Contact if an existing contact in Salesforce is not found.
-
Sync based on Registration Status
You can choose not to sync potential attendees (not registered). Or sync only the attendees that arrived at the event.
Mapping
Eventact will send the data to Salesforce fields according to the mapping rules: you need to define for each of the fields you need in Salesforce the Eventact token.
Examples
- {Account.First Name} = FirstName
- {Account.Last Name} = LastName
- {Account.Email} = Email

To have the correct name of the field for mapping in Salesforce you need to:
- Click the gear icon (⚙️) in the top-right corner and select Open Advanced Setup.
- In the left-hand sidebar, expand Objects and Fields, then click Object Manager.
- Find and click on Contact in the list.
- Click Fields & Relationships in the left sidebar under the Contact object.
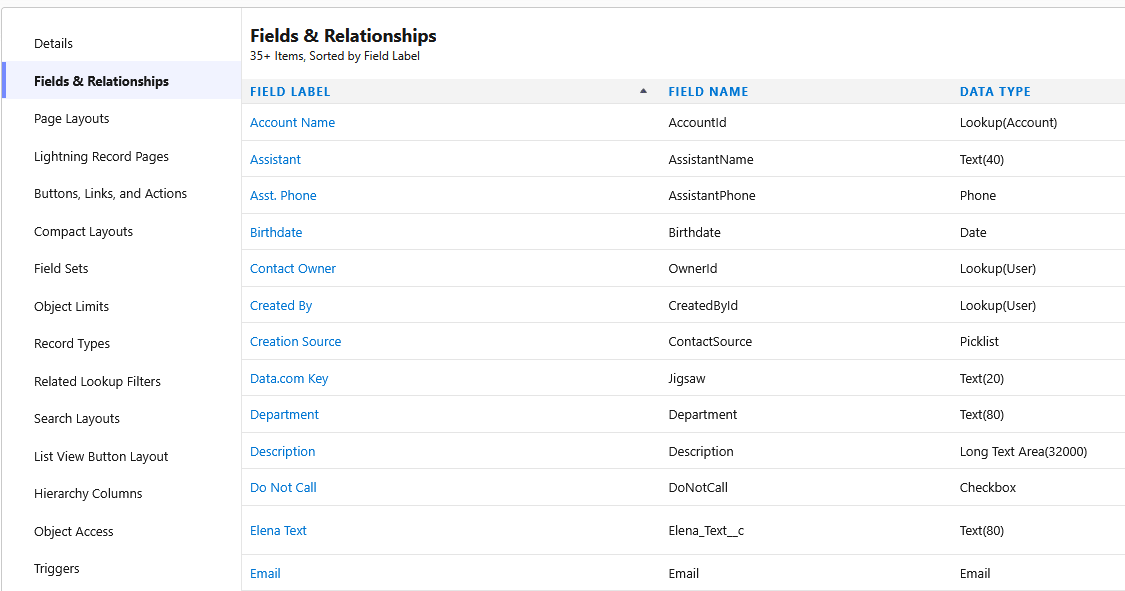
Also, you can create a custom field and synchronize it with Eventact.
- Navigate to the same place.
- Click the New button at the top.
- Choose the field type you need (e.g., Text, Picklist, Date, Checkbox, etc.), then click Next.
-
Fill in the required information:
- Field Label
- Field Name (auto-filled)
- Any additional settings
- Click Next to proceed.
- Add the new field to the contact list you need.
Below is an example of contact data in Salesforce that has been automatically synchronized from Eventact:
